
The DC vertical charging pile assembly line is an automated/semi-automated production line for mass production, composed of conveyor system, functional workstations and auxiliary equipment, with high efficiency, stable quality and easy operation.
A DC vertical charging pile consists of column main body, charging gun & cable, control panel, power conversion module, cooling system, communication interfaces, safety protection and metering & billing systems. Its assembly includes preparation, foundation construction, fixation, wiring and internal/external component installation. Testing covers insulation, grounding, DC withstand voltage, single unit and integrated commissioning.
DC vertical charging pile assembly lines are suitable to Assemble/Produce DC vertical charging piles. (If clients have more requirements or want to produce the other charging piles or other chargers, welcome to contact us.)
Part I. Structure, Assembly and Testing Processes of DC Vertical Charging Piles
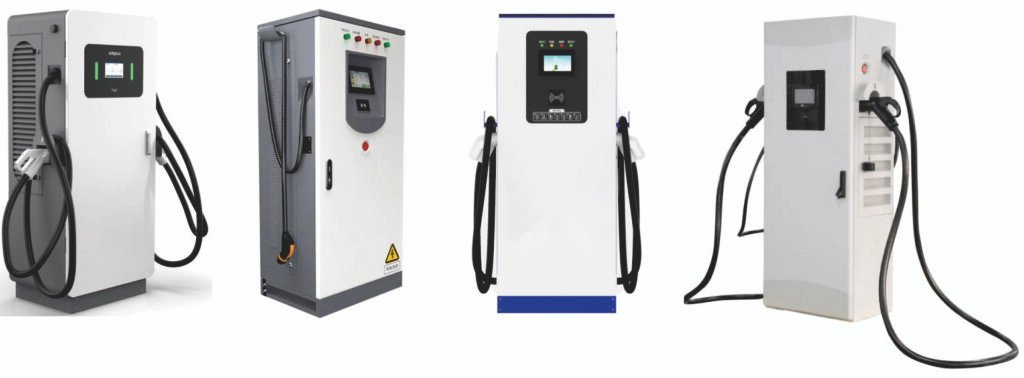
A DC vertical charging pile is mainly composed of a column main body, charging gun with cable, control panel, power conversion module and other components. Below is a detailed introduction to its structure, assembly and testing processes:
Structure
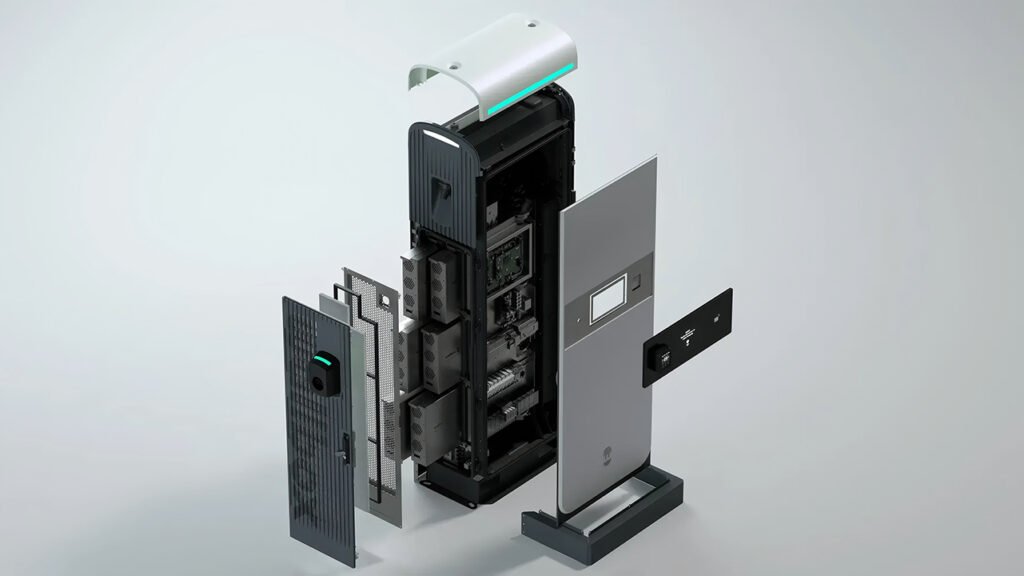
- Column main body: Generally made of metal materials with a certain protection class (e.g., IP54), it prevents water and dust from entering the interior and protects internal components.
- Charging gun & cable: Equipped with a charging gun and the corresponding cable for connecting to the charging port of electric vehicles; the cable length is usually adaptable to the charging port positions of different vehicle models.
- Control panel: Integrates a human-machine interaction interface (e.g., touch screen or buttons) for user operation and information display, such as charging status, remaining power, cost calculation, etc.
- Power conversion module: The core component of the charging pile, which converts alternating current (AC) from the power grid into direct current (DC) for charging the batteries of electric vehicles.
- Cooling system: Adopts air cooling or water cooling to prevent overheating of the equipment during high-power output.
- Communication interfaces: Including CAN communication interface, wireless communication interface, etc., for communication with vehicles, background management systems and payment systems.
- Safety protection devices: Such as overload protection, short-circuit protection, leakage protection, etc., to ensure the safety of the charging process.
- Metering & billing system: Built-in electric energy meter that records charging power and connects with the billing system to realize the calculation of charging fees.
Assembly Processes
- Preliminary preparation: Prepare equipment and materials such as charging pile main unit, charging gun, cable, expansion screws, waterproof sealing rings, as well as tools including impact drills, wire crimpers, screwdrivers, etc.
- Foundation construction: Determine the foundation position of the charging pile according to the design drawings, carry out foundation pit excavation, steel bar binding and formwork support, then pour C30 commercial concrete and conduct curing to ensure the strength and stability of the foundation.
- Charging pile fixation: Place the charging pile main unit upright at the marked position, adjust to the horizontal level, drill holes at the base fixing holes with an impact drill, insert expansion tubes and screw in expansion screws to ensure the main unit is stable without shaking.
- Wiring connection: Lead the cable out from the distribution box, lay it to the charging pile installation point through PVC pipes; connect the three-phase live wires to the input end of the DC module, the neutral wire to the neutral bar, the ground wire to the ground bar, and the communication wire to the main unit’s communication interface. After wiring, check the tightness of terminals and measure the insulation resistance to ground with a megohmmeter.
- Internal component installation: Open the charging pile door and install components such as circuit breakers and contactors in accordance with the manual. Before connecting the main cable to the copper busbar, crimp OT-type cable lugs with a hydraulic crimper; use shielded twisted pair for control circuits and install surge protectors at both ends; adopt yellow-green double-color multi-strand flexible copper wire for the ground wire with a cross-sectional area of ≥6mm².

Testing Processes
- Circuit insulation resistance test: Use a 500V megohmmeter to test the insulation resistance of the charging pile’s power cables and control cables. The insulation resistance value of power cables shall be ≥10MΩ, and that of control cables shall be ≥2MΩ.
- Grounding resistance test: Use a grounding resistance tester to measure the grounding resistance of the charging pile body, distribution box, etc. The grounding resistance value of the combined grounding system shall be ≤4Ω, and that of the independent grounding system shall be ≤10Ω.
- Cable DC withstand voltage test: Use a DC withstand voltage tester to test the DC side cables of the DC charging pile. The test voltage is 1.5 times the rated voltage of the cable, with pressure applied continuously for 5 minutes. During the test, there shall be no breakdown or flashover, and the leakage current shall be stable with no obvious increase.
- Equipment single unit commissioning: Check the wiring and specifications of fuses and circuit breakers before power-on. During no-load commissioning, check whether the display screen, start-stop function, cooling system, etc. work normally, and calibrate parameters such as output voltage and current with a multimeter, oscilloscope and other instruments.
- System integrated commissioning: Connect the standard charging gun with a simulated load or a test electric vehicle, check the plug-in and communication functions of the interface, test the smooth switching of each stage during the charging process, and verify the normal operation of protection functions such as charging interruption, overvoltage protection and overcurrent protection.
Part II. Introduction to DC Vertical Charging Pile Assembly Line
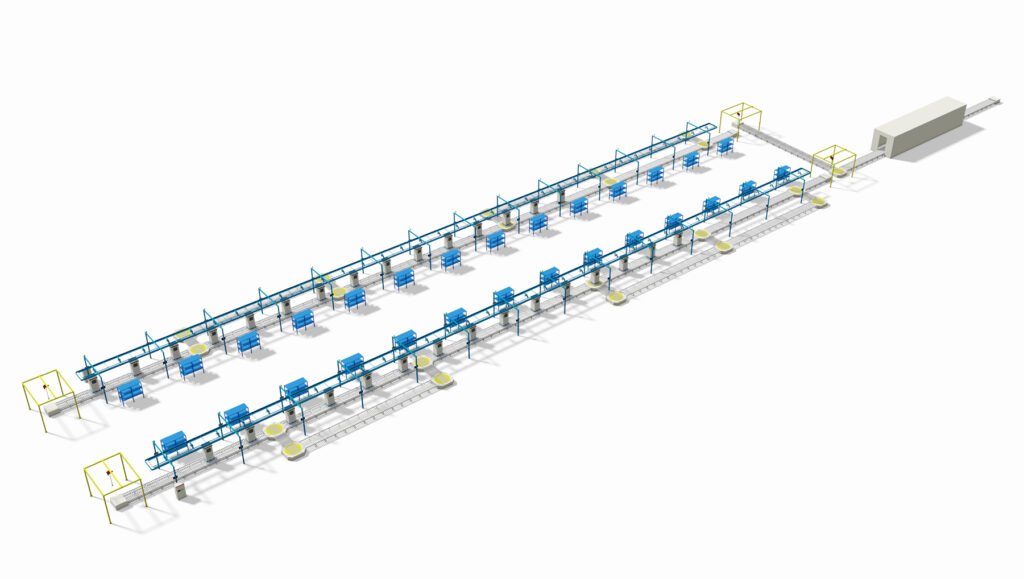
A vertical charging pile assembly line is a specialized automated (including semi-automated) production line for mass-producing vertical charging piles. Its core function is to systematically assemble various components of charging piles into a complete, usable vertical charging pile in accordance with fixed processes and standards. It balances production efficiency, assembly quality, and operational convenience throughout the entire process, and is widely used in charging pile production workshops.
The entire assembly line is not a single piece of equipment, but consists of multiple connected operation links (workstations). Each workstation is responsible for specific assembly tasks. Components enter the production line from one end, undergo orderly operations at all workstations, and finally output finished charging piles from the other end, forming a complete production process from “parts to finished products”. This not only reduces errors caused by manual operations but also greatly improves the efficiency of mass production.
I. Overall Layout and Core Composition of the Assembly Line
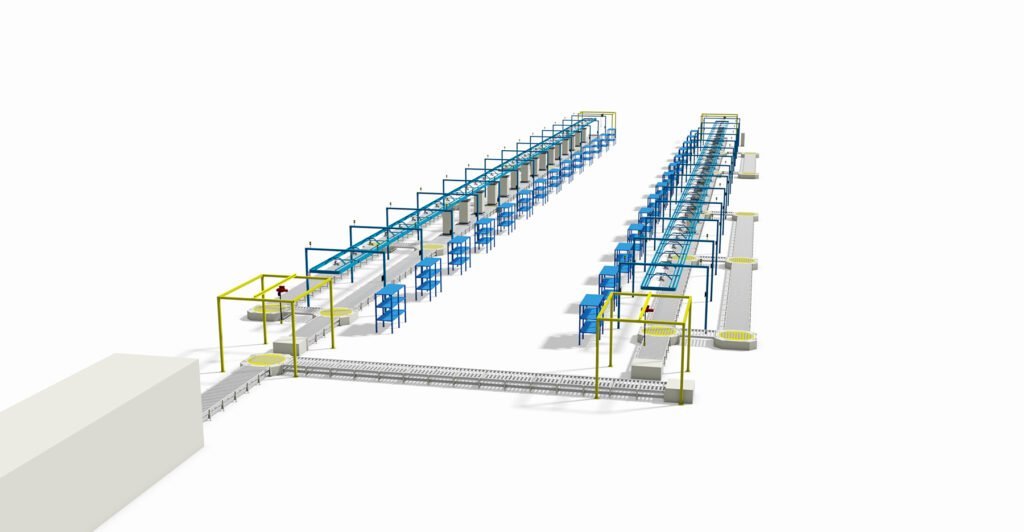
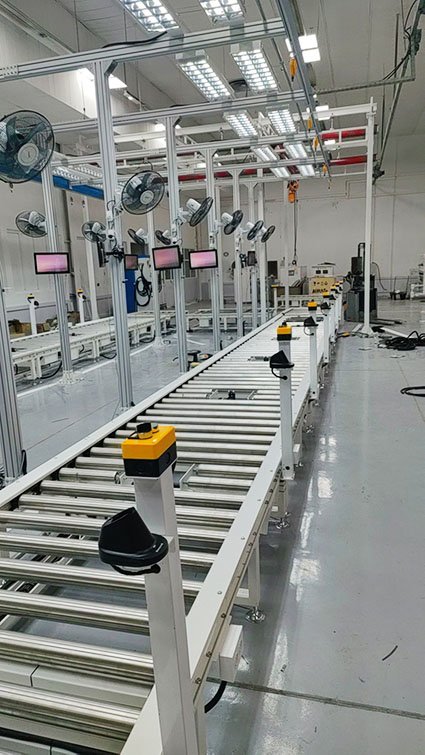
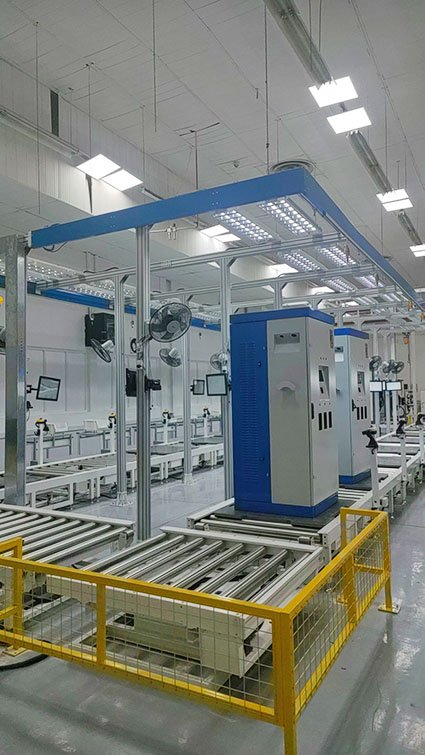
The layout of the assembly line is usually linear or U-shaped, facilitating the transfer of components and worker operations. It is mainly composed of three core parts: “conveyor system + functional workstations + auxiliary equipment”, with a simple overall structure and clear division of labor:
- Conveyor System: Equivalent to the “conveyor belt” of the assembly line, it is mainly responsible for sequentially transporting core components such as the base and column of the charging pile to each operation workstation. It eliminates the need for manual handling, saves labor, ensures a unified conveying rhythm, and avoids collision damage to components.
- Functional Workstations: Arranged in the order of assembly, each workstation is only responsible for one or two specific operations to avoid confusion. Common workstations include: base pre-assembly workstation, column assembly workstation, internal component installation workstation, wiring connection workstation, charging gun and cable assembly workstation, shell packaging workstation, and finished product inspection workstation.
- Auxiliary Equipment: Cooperates with each workstation to complete operations, such as fixtures for fixing components, simple instruments for testing whether the lines are smooth, tools for organizing lines, and equipment for cleaning finished products, making the assembly process smoother and more standardized.
II. Core Workflow of the Assembly Line (From Parts to Finished Products)
The entire assembly process follows the principle of “from foundation to core, from inside to outside”, with close connection between each link to ensure the quality of finished products. The specific workflow is as follows:
- Preliminary Preparation: Workers sort out various components required for production (base, column, internal lines, control panel, charging gun, cable, seals, etc.) and place them on the material racks of the corresponding workstations by type, ensuring that each workstation can quickly obtain the required parts without delaying the production rhythm.
- Base and Column Assembly: The conveyor system transports the base to the first workstation. Workers first fix the base firmly, then accurately install the column on the base and tighten the fixing screws to ensure that the column is vertical and stable. This is the foundation of the entire charging pile assembly, avoiding deviations in subsequent assembly.
- Internal Component Installation: The base with the column installed is transported to the next workstation. Workers install the core internal components of the charging pile (such as power conversion-related components, safety protection components, metering components, etc.) into the column as required and fix them with fixtures to ensure that the components are in the correct position and will not loosen during transportation or use.
- Wiring Connection: After the installation of internal components is completed, it is transported to the wiring connection workstation. Workers connect various lines (power supply lines, communication lines, control lines, etc.) to the corresponding components in accordance with specifications. After connection, a simple inspection is conducted to ensure that the lines are firmly connected, free of looseness and wrong connections, and avoid subsequent circuit failures.
- External Component Assembly: After the line inspection is passed, it enters the external component assembly workstation. Workers sequentially install the control panel, charging gun bracket, and cable storage device, then connect the charging gun with the cable, fix it on the bracket, and finally install the shell and seals of the charging pile to achieve waterproof and dustproof treatment.
- Finished Product Inspection: The assembled charging piles are transported to the inspection workstation. Through simple operations, workers test the basic functions of the charging piles (such as whether the control panel display is normal, whether the charging interface is smooth, whether the lines are leaking electricity, whether the shell sealing is in place, etc.), eliminate unqualified products, and ensure that each output charging pile can be used normally.
- Packaging and Delivery: After cleaning, the qualified finished charging piles are transported to the last workstation. Workers package and label them, then put them into the warehouse, waiting for subsequent delivery and transportation.

III. Characteristics and Advantages of the Assembly Line
- High Efficiency: Adopting assembly line operation, each workstation has a clear division of labor, and component transportation is automated, which greatly reduces the time for manual handling and operation. Compared with scattered manual assembly, it can improve production efficiency several times, making it suitable for mass production of vertical charging piles.
- Stable Quality: The assembly process is fixed, and each link has clear operating standards, which reduces errors caused by manual operations. At the same time, each key workstation has a simple inspection link, which can timely find unqualified assemblies and ensure the unity and stability of the quality of finished charging piles.
- Easy Operation: The operation of each workstation is relatively simple, and workers can get started after simple training without mastering complex professional technologies, reducing labor costs and training costs.
- Flexible Adjustment: The workstations of the assembly line can be appropriately adjusted according to production needs (such as different models of vertical charging piles, different production batches), adapting to the production of various specifications of vertical charging piles, with strong practicality.
IV. Daily Operation and Maintenance of the Assembly Line
To ensure the normal operation of the assembly line, two core tasks need to be done daily: first, regularly check the operation status of the conveyor system and auxiliary equipment, and replace worn parts in a timely manner to avoid equipment failures affecting production; second, standardize worker operations, require workers to complete the assembly of each link according to standards, sort out materials in a timely manner, keep the workstations clean and tidy, and avoid loss, damage or assembly errors of components.
In simple terms, a vertical charging pile assembly line is a “standardized and efficient charging pile production line”. Through division of labor and cooperation and automated assistance, it quickly assembles various parts into qualified vertical charging piles, meeting the market demand for mass production of charging piles and ensuring the stability of product quality.
We can customize according to the client’s product specifications, production capacity or other requirements.
We provide comprehensive services including design, production, and installation/commissioning.