SKD E-scooter Assembly Line—Electric Motorcycle Assembly Line
SKD (Semi Knocked Down)
- Definition: Refers to products being exported in a partially assembled state, usually pre-assembled into larger components or modules, with simpler final assembly conducted at the destination.
- Application in Electric Scooters: The factory receives major pre-assembled modules like the “frame assembly” (frame + front fork + partially pre-installed wiring), “hub motor assembly” (motor already mounted in the wheel hub), and “battery pack.” Local workers primarily connect these major modules together.
Two-Wheel Electric Scooter SKD Assembly Line
1. Characteristics of SKD Mode (Compared to CKD)
- SKD Mode: Receives semi-finished major assemblies. For example, the front section may come pre-assembled with the handlebar, instrument cluster, wiring harness, front brake, and front wheel; the frame may be fully welded and painted.
- CKD Mode: Receives all individual parts. For example, the frame, front fork, handlebar, and every screw and nut are separate, requiring assembly from scratch.
The SKD mode significantly simplifies the processes in the final assembly workshop.

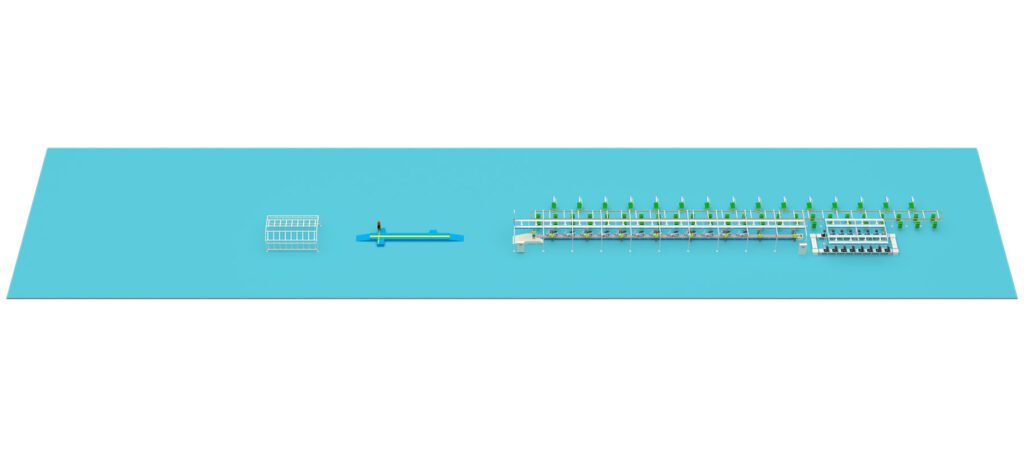
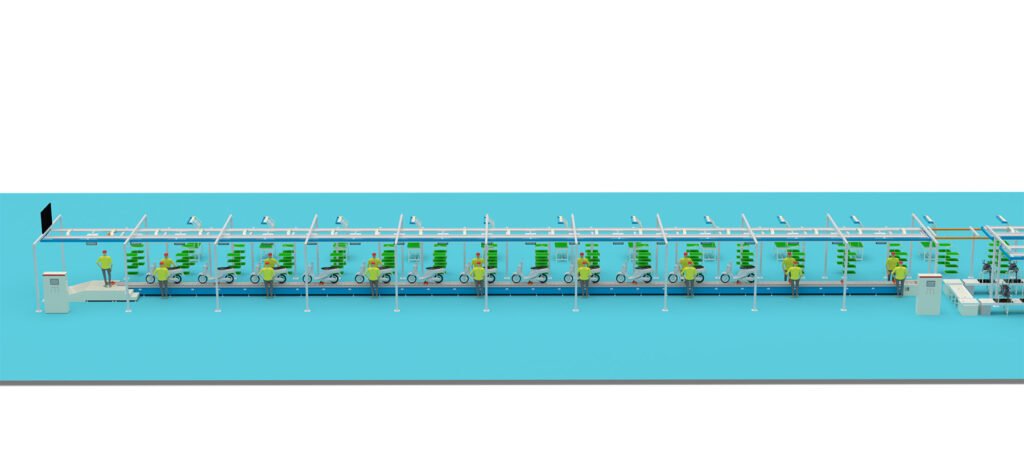
2. Typical SKD Assembly Line Layout and Workstation Design
A typical SKD assembly line is a flow line, where the vehicle chassis (or frame) is placed on a moving conveyor belt and passes through various workstations in sequence.
1. Loading & Frame Assembly Installation Station
- Materials: The core of the SKD kit—the main frame assembly (often including the rear swingarm and pre-installed main cable harness).
- Operations: Hoist or place the frame assembly onto the fixture on the conveyor line. Install the footrests and side stand/center stand.
2. Powertrain Installation Station
- Materials: Rear wheel assembly (hub motor, tire, brake disc/drum, possibly pre-assembled with transmission gears), battery pack.
- Operations:
- Install the rear wheel assembly onto the frame’s rear swingarm, tighten the axle nut, and connect the motor phase wires/Hall sensor wires.
- Insert and lock the battery pack into the frame’s battery compartment.
3. Front Assembly Installation Station
- Materials: Front fork assembly (including front wheel, tire, brake caliper/drum, fender pre-installed), handlebar assembly (including handlebar, instrument cluster, switches, wiring harness, brake levers, mirror mounts, etc.).
- Operations:
- Insert the front fork assembly into the head tube and install the headset bearings and tightening nuts.
- Mount the handlebar assembly onto the front fork steerer tube and tighten.
- This is a key SKD station, rapidly joining two major modules.
4. Electrical System Connection Station
- Materials: Controller, charging port, etc.
- Operations:
- Install the controller (usually fixed inside the frame).
- Perform core electrical connections: Connect the wiring harness from the handlebar assembly (lights, horn, switch signals), instrument cluster harness, motor harness, battery output wires, etc., to the controller via connectors. The advantage of SKD is evident here—most wiring is pre-installed, requiring mainly “plug-and-play.”
- Install the under-seat storage box.
5. Function Testing & Adjustment Station
- Operations:
- Power-on Test: Insert the key or use a card to check instrument display, lights (headlight, turn signals, brake light), horn, and switch responses.
- Power Test: Twist the throttle to test if the motor operates normally (with rear wheel lifted).
- Brake Test: Test the effectiveness of front and rear brakes and the brake cut-off function.
- Mechanical Adjustment: Adjust brake tension and tire pressure.
6. Body Panel Installation Station
- Materials: Front fairing assembly, footboard, seat, etc.
- Operations: Install plastic covers, decorative parts, and the seat. These may also be supplied as sub-assemblies.
7. Final Inspection & Offline Station
- Operations: Conduct a comprehensive visual inspection, road test (short-distance ride in a test area), and clean the vehicle.
- Offline: Attach the compliance certificate and vehicle identification plate, then load for shipment.
3. Advantages of an SKD Assembly Line
- High Assembly Efficiency: Modular assembly reduces the time needed to pick, align, and fasten individual parts, speeding up the production line cycle.
- Stable Quality: Key assemblies (e.g., handlebar, front fork) are pre-assembled and adjusted professionally by the supplier or upstream factory, ensuring better consistency.
- Lower Technical Requirements for Workers: Assembly workers function more like technicians “building blocks” rather than highly experienced mechanics, simplifying training.
- Simplified Production Line: Requires relatively simple tools and equipment, with no need for complex pre-processes like welding or painting.
- Rapid Market Response: Enables quick establishment of assembly lines in target markets, shortening time-to-market.
4. Support Required for an SKD Assembly Line
- Precise Supply Chain: Requires suppliers to provide high-quality, well-matched modular assemblies on time.
- Robust Material Management System: Each station needs just-in-time delivery of corresponding major assemblies, making logistics planning complex.
- Quality Control Shifted Upstream: Incoming assemblies must undergo strict inspection, as a faulty module can halt the entire line.
- Standardized Work Instructions: Each station must have clear, visual work instructions to ensure assembly consistency.
Summary
The SKD assembly line for two-wheel electric scooters is a modern manufacturing system that heavily relies on modular design and supply chain collaboration. It front-loads the most complex component integration work, enabling final assembly plants to achieve scaled production through “rapid module joining.”